Sophos UTM – SSL Web Proxy Scanning Configuration and GPO Deployment
This document will provide instructions on how to implement SSL Scanning to filter websites that use HTTPS on a Sophos UTM firewall.
Home editions of Sophos UTM are available Free here, however please note that you do have to register with Sophos to receive your free license. You can run this as a physical server using a small PC or a Virtual Server on ESXi/HyperV.
Requirements:
– Access to manage the Sophos UTM
– A test computer on the network subnet that SSL Scanning is being enabled for.
– Access to the Active Directory Server and GPO management.
- Log into the clients Sophos Router https://SophosIPAddr:4444
- Use your credentials to log in
- Go to Web Protection, Web Filtering, HTTPS CAs and click on Download under Signing CA
DO NOT CLICK REGENERATE. If you do then the existing certificate deployment will fail and you will have to do this all over again.

- Use export type PEM. Click Download.
- Now that we have the SSL certificate that is needed to enable HTTPS scanning we will need to import it into group policy. Open Group policy and edit the default domain policy if you want it to apply to the entire domain. Or you can create a new GPO and link it to whatever OU you want it to apply to.
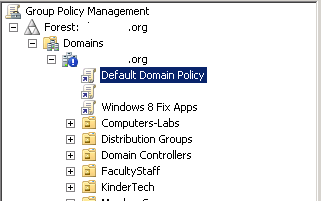
- Go to Computer Configuration, Policies, Windows Settings, Security Settings, Public Key Policies, Trusted Root Certification Authorities
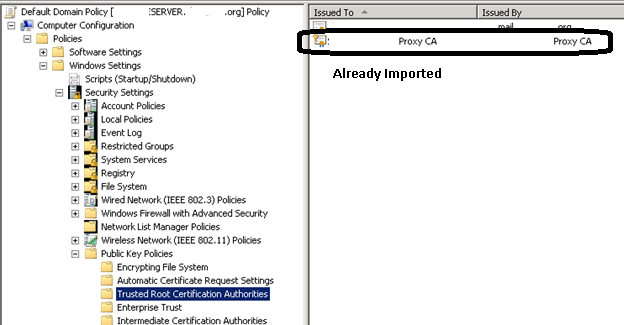
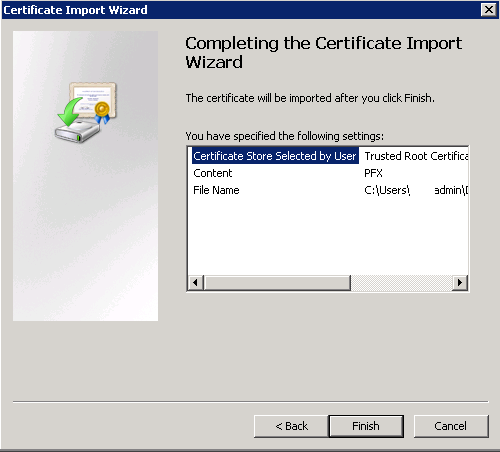
- Here you can see I already have a Proxy CA certificate. Yours might be called something else but it will have the word proxy in it. Since I need to reimport it, so I will go ahead and update this. If you need to update it, first Delete the existing Proxy CA. Then right click and select import.

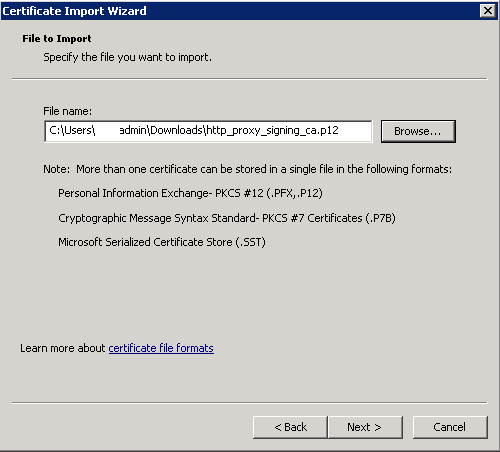
- Click Next and browse for the certificate you just downloaded. When you browse you may have to select All Files to see the certificate. Use the date modified to your advantage because sometimes you might have multiple certificates show up.
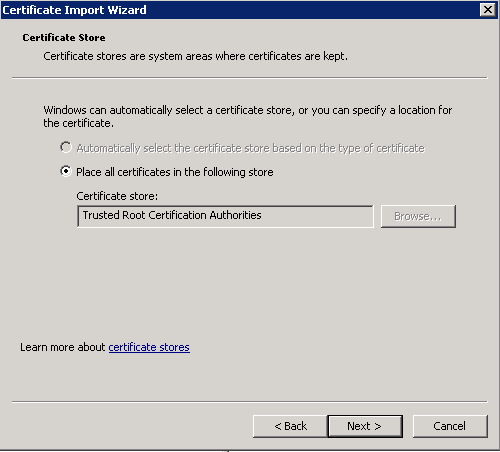
- Make sure Trusted Root Certification Authorities is selected and click next.
- Click Finish
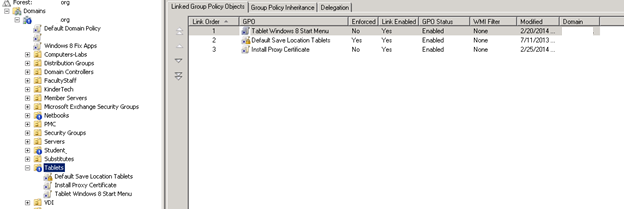
- Now we have the Proxy CA

- Verify all the Domain Controllers replicate this.
- Now we need to check and make sure they do not have block inheritance on any OUs with computers. Typically people don’t use this but you need to double check and make sure. Here you can see the blue exclamation marks which means they have block inheritance on. That means these OUs will not get the default domain policy. DO NOT CHANGE ANY OU settings. Do not use Enforced settings. Just make the changes explained in this document that need to be made to get the certificate installed. Do not make any changes that can impact users.

- So in this example, Netbooks, Student, Tablets, Windows 8, need to have the newly created group policy linked. Fo each OU and Link the new Install Proxy Certificate. Remember this certificate is install on the computer level not user level. So the Students OU wouldn’t matter since it just contains student accounts.
- Now that we have the certificate deployed to Active Directory we need to have all computers restarted. When they restart they will install the certificate. Restart your test computer. Alternatively you can run gpupdate /force from command line.
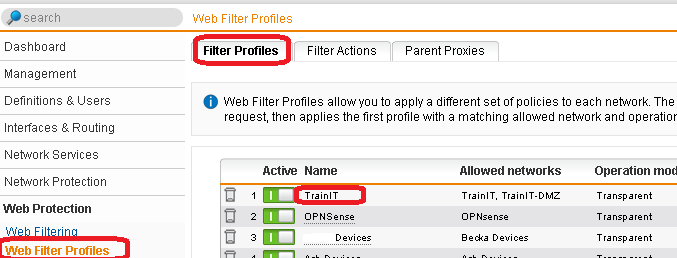
- Now we need to enable SSL scanning. In the Sophos UTM, go to Web Protection, Web Filtering Profiles, Filter Profiles.
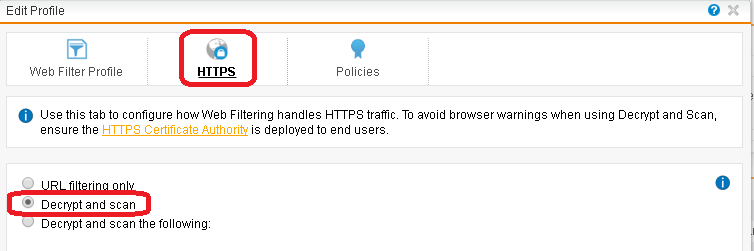
- Edit All of the profiles and select HTTPs and select Decrypt and Scan and click Save.
- Make sure you enabled Scan HTTPS for all of the profiles. Now on the test computer open up internet explorer and go to https://www.bankofamerica.com. If you get a certificate not trusted warning then you need to restart.
- If you are using a Standard Proxy instead of Transparent, you need to make sure you have a “FallBack” filter profile. This profile is used to ensure that anyone without proxy settings at least gets filtered transparently. So under Webfiltering Proxy Profiles in this screen shot you can see that there is a proxy fallback profile.
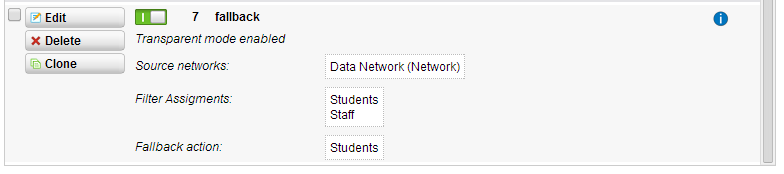
If you don’t have one then follow these steps- Click New Proxy Profile

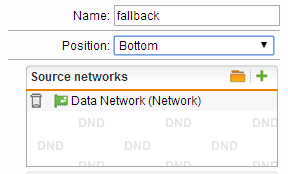
- The name should be called fallback. The position should be bottom. We want this to be very last. The network should be the LAN internal Network
- Make sure Fallback action is set to the most restrictive Filter. This is important! Then make sure operation mode is transparent. Authentication type is none. Full transparent is UN-CHECKED. Make sure Decrypt and Scan is checked in HTTPs tab.

- Click Save.
- So now if you go to a device that does not have proxy settings in internet explorer and view the Sophos Live Log you should see that device profile listed as fallback.

- Click New Proxy Profile
- Now if you need to install the certificate on the IPADs then go to http://passthrough.fw-notify.net/cacert.pem. When the IPAD tries to access that site behind the Sophos it will pop up with an option to install the certificate. Note an IPAD may require the PKCS cert exported from step 2.
- The client should do some extensive testing to ensure the sites the need to access work.