OPNsense – Transparent Caching Filtering Proxy with Virus Scanning – Step 5 OPNsense Category Filtering
This is a pretty long guide, even before I added images, so it is broken it into sections. I hope it is easy to follow; if you find any errors, please Contact us!
Step 5 – Adding Filtering
You can refer to this guide as well. Here we add proxy scanning to filter by category.
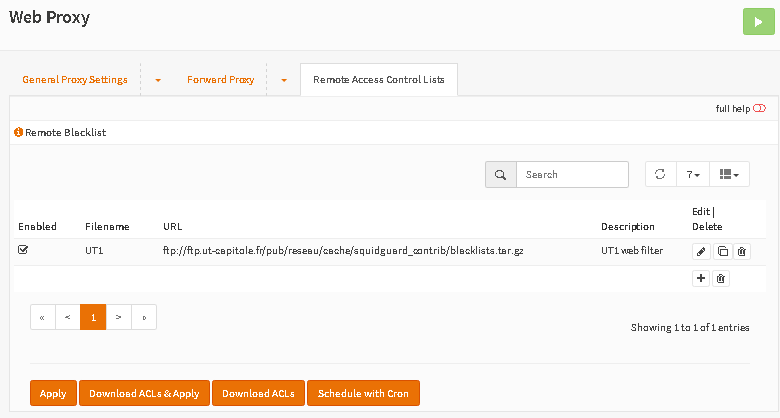
- In OPNsense, go to Services->Web Proxy->Administration, click Remote Access Control Lists.
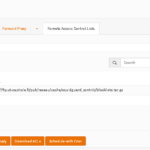
- Click the + button at the bottom right.
- Enter the following information:
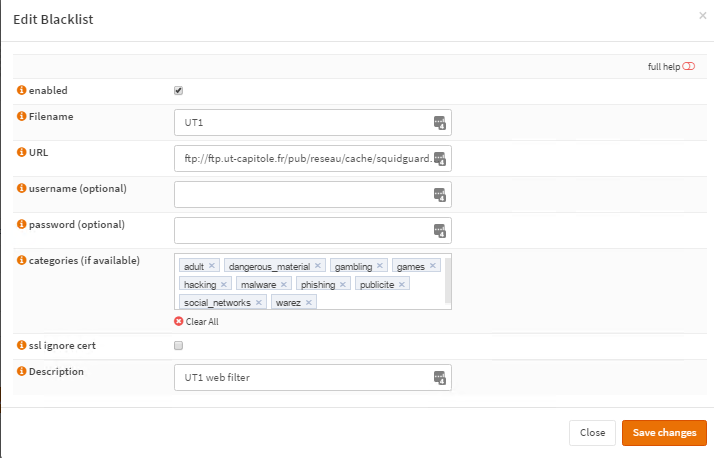
Filename = UT1
URL = ftp://ftp.ut-capitole.fr/pub/reseau/cache/squidguard_contrib/blacklists.tar.gz
Description = UT1 web filter
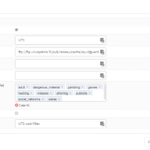
NOTE: Categories are filled in on the image; however you will not yet have categories – you will add them below.
- Click Save Changes
- Click Download ACLs and wait for it to complete (a few minutes)
- Now edit the UT1 entry you created. Clear the list of categories by clicking Clear All. Then type in those you want to add back. I personally like the below. Note to hit Enter after typing each one so it boxes it up. Also note publicite is ads:
adult dangerous_materail gambling games hacking malware phishing publicite social_networks warez
- Click Save Changes.
- Click Download ACLs & Apply.
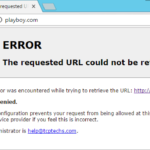
- If you entered adult as a category, you can attempt to access a site like playboy from a Proxied PC and it should be blocked.

This completes Step 5