OPNsense – Transparent Caching Filtering Proxy with Virus Scanning – Step 2 CentOS Install ClamAV
This is a pretty long guide, even before I added images, so it is broken it into sections. I hope it is easy to follow; if you find any errors, please Contact us!
Step 2 – Install and configure ClamAV and SquidClamAV on CentOS 7 x64
Much of this was provided with the help of these two guides: Install Clam and Install SquidClamav
- These should already be installed, but just in case, install build tools for building the c_icap and squidclamav packages:
yum -y install gcc make - Install ClamAV:
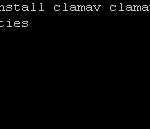
yum –enablerepo=epel -y install clamav clamav-update clamav-scanner clamav-scanner-systemd
- Comment out the word Example on line 8 by adding a # in front of Example:
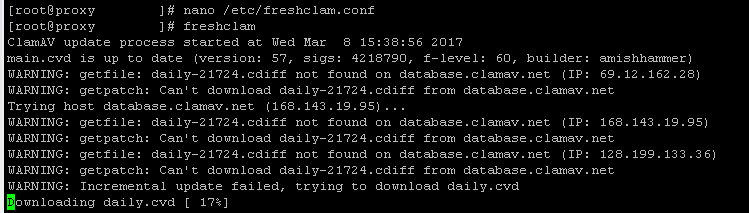
nano /etc/freshclam.conf
- Run freshclam in order to update the Clam AV databases:
freshclam
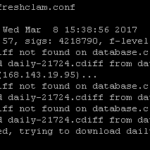
- NOTE: If you get errors that freshclam cannot download updates, delete the mirrors.dat file using this command and then try again:
rm /var/lib/clamav/mirrors.dat
- NOTE: If you get errors that freshclam cannot download updates, delete the mirrors.dat file using this command and then try again:
- Make sure you are in your Home directory and download a test virus (assuming your username is user1) Also, if the test file downloads properly, it should be 68 bytes, which I mention because your firewall may block it:
cd /home/user1
curl -O http://www.eicar.org/download/eicar.com - Test clam using this command:
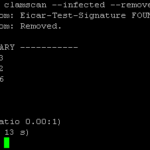
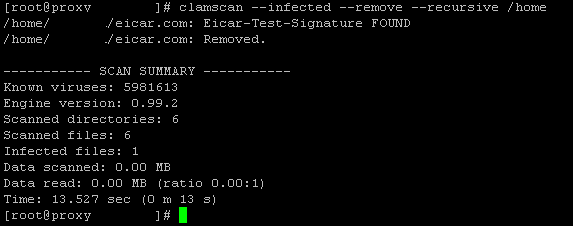
clamscan –infected –remove –recursive /home
You should get this output:
/home/user1/eicar.com: Eicar-Test-Signature FOUND

/home/user1/eicar.com: Removed.
- Configure clamd.d scan:
nano /etc/clamd.d/scan.conf- Comment out line 8:
#Example
- Uncomment line 14:
LogFile /var/log/clamd.scan - Uncomment line 66:
PidFile /var/run/clamd.scan/clamd.pid - Uncomment line 70:
TemporaryDirectory /var/tmp - Uncomment line 85:
LocalSocket /var/run/clamd.scan/clamd.sock - Uncomment line 101:
TCPSocket 3310 - Save and exit the file
- Comment out line 8:
- Create the file /var/log/clamd.scan and set ownership:
touch /var/log/clamd.scan
chown clamscan. /var/log/clamd.scan - Start the clamd service and set it to auto-start:
systemctl start clamd@scan
systemctl enable clamd@scan - Install c-icap
- Download the file:
curl -L -O http://downloads.sourceforge.net/project/c-icap/c-icap/0.4.x/c_icap-0.4.2.tar.gz - Extract, change directory, configure, make, make install, change directory, and copy the folder by running these commands, one at a time:
tar zxvf c_icap-0.4.2.tar.gz
cd c_icap-0.4.2
./configure
make
make install
cd
cp /usr/local/etc/c-icap.conf /etc
- Download the file:
- Edit the config for c-icap:
nano /etc/c-icap.conf- On line 161 change admin email address for your site:
ServerAdmin noreply@tcptechs.com - On line 170 change computer hostname to valid DNS address for this PC (you should also create an internal DNS entry for this):
ServerName proxy.tg.local - On line 568 add this:
Service squidclamav squidclamav.so - Save and exit the config file
- On line 161 change admin email address for your site:
- Create new file at /etc/tmpfiles.d/c-icap.conf:
nano /etc/tmpfiles.d/c-icap.conf
Enter this text in the file:
d /var/run/c-icap 0755 root root – - Create new file at /usr/lib/systemd/system/c-icap.service:
nano /usr/lib/systemd/system/c-icap.service
Enter this text in the file:
[Unit]

Description=c-icap service

After=network.target

[Service]

Type=forking

PIDFile=/var/run/c-icap/c-icap.pid

ExecStart=/usr/local/bin/c-icap -f /etc/c-icap.conf

KillMode=process

[Install]

WantedBy=multi-user.target - Install squidclamav (the Clam component that works with c-icap)
- Download the file:
curl -L -O http://downloads.sourceforge.net/project/squidclamav/squidclamav/6.14/squidclamav-6.14.tar.gz - Run these commands to extract, cd, configure, make, make install, cd, and link the file by running these commands one at a time:
tar zxvf squidclamav-6.14.tar.gz
cd squidclamav-6.14
./configure –with-c-icap
make
make install
cd
ln -s /usr/local/etc/squidclamav.conf /etc/squidclamav.conf
- Download the file:
- Configure squidclamav:
nano /etc/squidclamav.conf- On line 18 change the URL for the Virus Error page. This is the same error page we created above. In this case I have an internal DNS A record for proxy which points to this server:
redirect http://proxy.tg.local/error.php - On line 27 change it from “clamd_local /var/run/clamav/clamd.ctl” to:
clamd_local /var/run/clamd.scan/clamd.sock - Save and exit the file.
NOTE: If you make changes to this file after starting the service, run the below commands to apply the settings:
echo -n “squidclamav:cfgreload” > /var/run/c-icap/c-icap.ctl
echo -n “reconfigure” > /var/run/c-icap/c-icap.ctl
- On line 18 change the URL for the Virus Error page. This is the same error page we created above. In this case I have an internal DNS A record for proxy which points to this server:
- Start the c-icap service and set it to auto-start:
systemctl start c-icap
systemctl enable c-icap - Test:
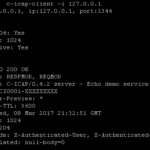
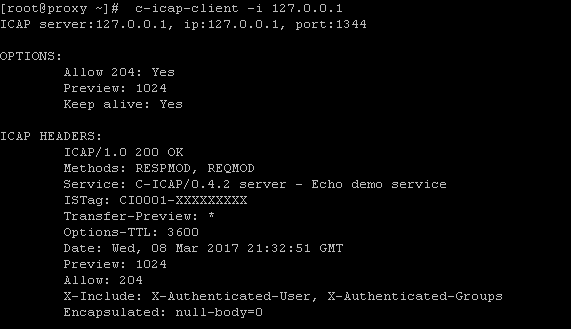
c-icap-client -i 127.0.0.1
This should output information about the i-cap service.
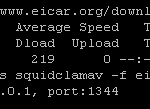
- Test 2 – Download the eicar.com file again with the below command and then run the command below that. You should get output similar to the first line of the above test:
curl -O http://www.eicar.org/download/eicar.com
c-icap-client -s squidclamav -f eicar.com -i 127.0.0.1
- Test 3 – If you are getting errors, you can try running this command and see if it gives an error:
c-icap -N -D -d 10 - If you are having issues, check the logs, and check the status of the services to make sure they are running:
tail /var/log/clamd.scan
tail /usr/local/var/log/server.log
systemctl status clamd@scan
systemctl status c-icap


We have completed Step 2.