OPNsense – Transparent Caching Filtering Proxy with Virus Scanning – Step 7 HTTPS Transparent Proxy
This is a pretty long guide, even before I added images, so it is broken it into sections. I hope it is easy to follow; if you find any errors, please Contact us!
Step 7 – Adding HTTPS Filtering to the Transparent Proxy
Note, do not proceed to this step if Transparent Filtering is not working. You can use this guide to help too.
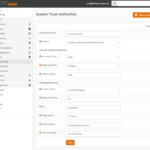
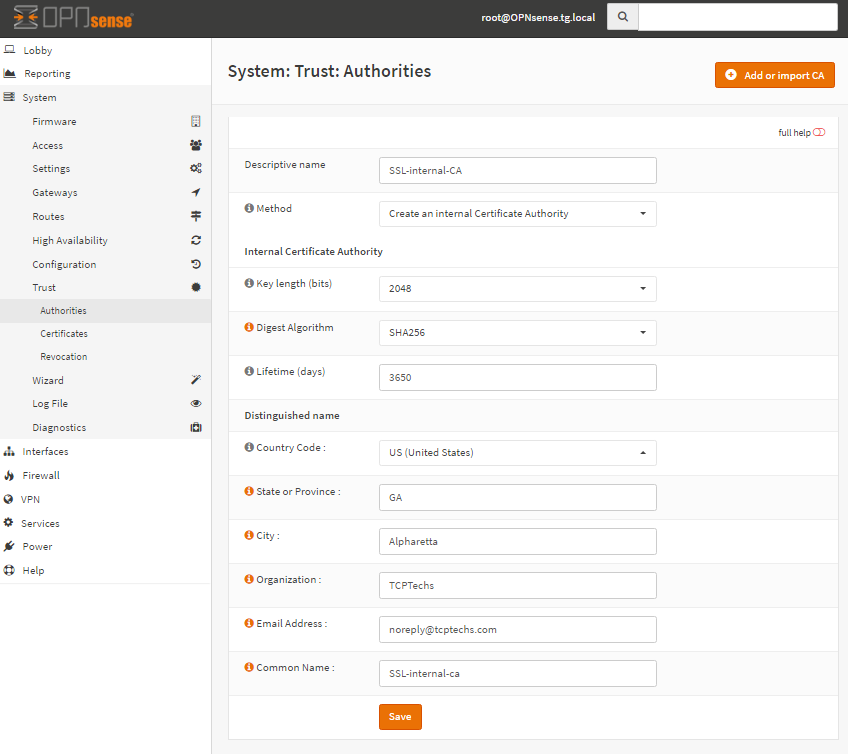
- In OPNsense, go to System->Trust->Authorities.
- Click Add or Import CA at the upper right.
- Enter Name OPN-SSL-CA
- Select Create Internal Certificate Authority
- Set Lifetime to 3650 for 10 years
- Set Country Code, State, City, Org, email, and Common Name per your company.
- Click Save.
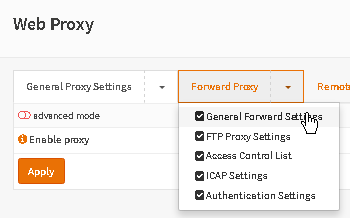
- In OPNsense, go to Services->Web Proxy->Administration, click the down arrow on Forward Proxy, and click General Forward Settings.
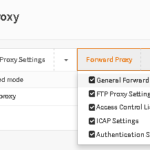
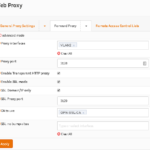
- Check Enable SSL Mode and Check SSL Domain/IP only. Also click in the CA to use box and select the CA you just created.
Note: We check the SSL Domain/IP only which prevents cert errors and other issues related to SSL Scanning. It’s easier to make work, and less maintenance. The downside is that the site content is not filtered and the content is not checked for viruses. If you want to disable this option, we will cover that in Optional Step 8.
- Click Apply.
- Go to Firewall->NAT->Port Forward.
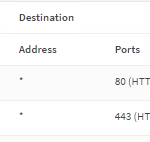
- Click the + to create a new NAT rule. Interface is the one with the Interface Subnet to Proxy. Protocol: TCP. Source: Interface net. Dst Port: 443. Dst IP: Any. Redirect IP: 127.0.0.1. Redirect Port: 3129. Description: Redirect HTTPS to Proxy. Filter Rule Association: None.
Note: I say Interface net for source because I assume you want to filter the entire subnet for the interface the proxy is on. You can of course change this, but don’t forget to also change the Allowed subnets in the Proxy settings.
- Save and apply NAT rule.
- Go to Firewall->Rules->the Interface tab for the Subnet being proxied.
- Add a new rule for Source the Subnet to be proxied, Dst IP: 127.0.0.1, Dst Port: 3129, and enable logging. Description: NAT Proxy Allow HTTPS. Set this rule above the firewall rule you created earlier for the Standard Proxy.
Note: You may ask why we manually created this rule when NAT can auto-create this rule. It’s because NAT auto-created rules have no option to enable logging, which can greatly help you if you have issues.
- Apply firewall settings.
- Test with a PC in the proxied subnet, and make sure IE is set with No proxy settings to see if it can access both NON HTTPS sites and HTTPS sites.
Also check the logs at Web Proxy->Log File->Access to verify you see hits for these sites.

This completes Step 7